This post may contain affiliate links (including amazon.com because we participate in the Amazon Services LLC Associates Program). Full disclosure is here.
Ever hopped over to a website only to find it loads slooooooowly? What if this is happening on your blog? You can wave good-bye to 90% of your mobile visitors if they wait 5+ seconds to see your content. And that’s straight from Google’s research mouth. Images can slow down your site. Use my free quick guide to optimize your images – before visitors shut you down.
You probably spend a lot of time taking and/or creating images for your blog. I know I do. They are a big draw-card in an online world. These pictures attract visitors to your site, get your brand noticed, and take those long blog posts from great to absolutely gorgeous.
But there’s a trick to using images online…
You need to shrink and optimize images before you upload them to your site. Don’t worry, it’s an easy trick to learn and totally free. Be sure to download the free quick guide to optimizing images at the end of this post. But first, you need to understand a little about images so you know what you’re doing and why.
Should we dive right in?
Why you need to optimize images
When we talk about ‘loading time’, we mean the amount of time it takes a website to load on a screen. And I mean any screen – a computer, a tablet, or a mobile device.
There are many reasons why loading time can be slow, and large uncompressed images is one of them. These images take up a lot of space and take time to load, making your site slower.
Imagine you’re a traveling salesperson selling kitchen knives. If you drive around with every knife range and all your excess stock in your car, it will take you a long time to take them out every time you want to show them to a customer. But if you pack a careful selection of your best knives in a little suitcase, you can quickly pull it out and showcase what you offer. The same goes for images – pack light through optimization!
Think with Google published the findings from their 2018 research:
No matter what, faster is better and less is more. We found that 79% of [website] pages were over 1MB… Simply compressing images and text can be a game changer.
Seconds count here: Nearly half of consumers expect a website to load in 2 seconds or less. Push it to 3 seconds and you’re losing them.
How can I check if image sizes are affecting my blog’s loading time?
I’m so glad you asked!
Just visit TinyPNG and fill in your url (web address) where it says ‘Enter your web page URL here‘. Then click on Analyze Page.
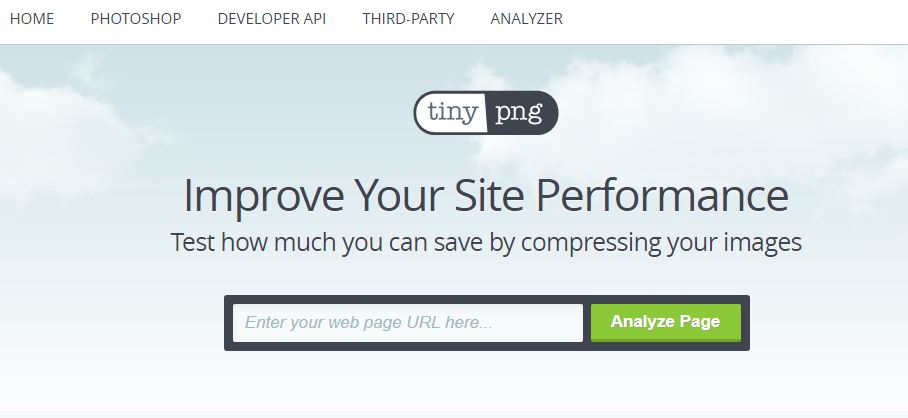
It will automatically check your site and give you stats on how many images are on there, the current (‘original’) image size, and what the optimum size could be. The optimum size is the smallest size you could make the images.
The last column gives you the most important info: how much time compressing your blog images will shave off your loading time. If you look below, you will see that I could take 0.4 seconds off my loading time on Tiara Tribe…
![]()
So, how do you optimize images before you put them on your blog?
First, make sure your images are the right size
I cannot give you a set size to use as each site’s layout is different and you will need to use the right size for your blog.
Image size is measured by width and height in pixels. The main image in this blog post is 1 000 x 750 pixels as that’s the standard size I set for the main images in my blog posts when I designed the site in Divi. Pixels are made up of dots per inch (dpi). The more dots you have per inch, the higher quality the picture but the larger the file size will be (we will go into more detail about this a bit later).
Start by resizing your image so it’s the right size in width and height. I use the Crop and Resize edits in PicMonkey to get my images to the right size, if I’m not using one of my templates. If you don’t want to use PicMonkey, you can always use ResizeImage to do this quite easily.
Once your image is the right size, it’s time to compress (shrink) and save it as the right file type…
Which file types should you use for images?
Use JPG or PNG files for images on websites.
JPG or JPEG (they’re the same thing) is the most popular file type for web images as it can be shrunk to a very small file size, helping your site to load faster. JPG files also retain a lot of colors and the quality of images.
Here’s a JPG of my logo with a color background:
![]()
Only use PNG if you need transparency in your picture, which is a part that’s ‘see-through’ without a colored background. PNG files are larger than JPGs, so they can slow down your site speed.
I use a PNG for my logo at the top of this page and my favicon in the browser above it, so there aren’t any colored blocks around the images or any background behind them – you just see the tiara and the text.
How do you measure image file size?
Image files are measured in kilobytes (KB) and megabytes (MB). One thousand kilobytes is equal to 1 megabyte.
You can check a file’s size by right clicking on the file and then clicking on Properties. Now click on the General tab and look for ‘Size’.
![]()
When should you check the file size of an image?
Always check the file size before you upload an image to your blog. Don’t ever upload an image and then resize it in WordPress. You are asking for trouble ?
I repeat, fix the image size (height and width) and the file size (kb) before uploading any image. This will make your life a lot easier.
How small should you make your image files?
Image files for websites should be less than 100kb and 72 dpi resolution. That’s 72 dots per inch. Keeping the resolution at 72 dpi makes sure that your picture doesn’t become blurry.
If you are creating products for print, you will use 300dpi as that’s high quality for printing. I’ve actually included a 5-step quick guide to optimizing images in the library just for you.
Remember that the smaller the file size, the quicker your blog page will load. A web page actually has many images on it, not just the one you are uploading to it. It has pictures with links to other pages, your logo, buttons, images in your sidebar widgets, and probably more – so make sure you keep each and every image as small as possible.
Will unused images in the WordPress library slow down your website?
No, unused images shouldn’t slow down your site if they’re sitting in your WordPress library collecting dust. But they will take up space on the server and make it more difficult for you to find what you need, when you need it.
Delete any images in the WordPress library that you don’t need. Streamlining and deleting excess are all part of optimization.
How to compress images before uploading them to your site
If you sourced the image from a stock photo site, took a photo with your camera, or didn’t use a template to create it, you will probably need to compress the file.
Here are two ways you can compress images by shrinking their file size using online editors:
- Use PicMonkey to compress images
I compress my images when I download them from PicMonkey. I find this extremely easy to do, so I stick with it.
To do this, create your image in PicMonkey at the right size (height and width), then click on Export above the image.

Select JPG where you see PNG and then LOW or MEDIUM quality. You will see the file size below the dimensions – 84.5 kilobytes for my image is small and perfect for what I need. It needs to be less than 100kb and still good quality for the web!

Export the image to your computer, save it and upload it to WordPress.
Voila! Mine’s at the top of my post as my featured image and won’t slow down my blog.
- Use TinyPNG to compress one or many images
Despite it’s name, TinyPNG compresses many file types (including JPG) and can do multiple images at once. Just visit the panda, then drop your files in at the top of the page. Your images will be compressed in seconds and ready for you to download.
You can upload up to 20 files that are 5MB each right here:
![]()
Check the file size of your compressed image
To check the file size of an image, go to the folder where you saved it on your computer. Right-click on it and choose Properties. Make sure you have the General tab open, then look for the size. Make sure that the image size is less than 100kb.
If is isn’t smaller than 100kb, you can run it through TinyPNG again to make it smaller. Just check the image carefully after the second compression, to make sure it isn’t blurry!
What other services can you try to compress images?
I know we all like to try different things. PicMonkey works like a charm for me, but you might want to know what other programs, online services and plugins you can use to compress your images.
Here are some others that my blogging friends recommend (I haven’t tried them so I can’t recommend or review them personally):
Online editors that compress images:
ShortPixel – Can shrink image files by 70%+! This is a paid option with a WordPress plugin available.
Gimp – I have tried Gimp and found it difficult to understand and use. I gave up quickly, but many people I know love it.
Computer programs that compress images:
Adobe PhotoShop – To compress images in PhotoShop, go to Image at the top of the PhotoShop page, then click on Image Size. You can change the resolution to 72dpi and Export the image for web.
Plugins that compress images (I recommend keeping plugins to a minimum – see my post about WordPress plugins and what you really need to know):
Imagify – Can shrink file sizes by 70% or more! The free plan is apparently great, but there is a paid option and a WordPress plugin is available
WP Smush – Apparently this plugin only reduces file sizes by 5% (far too little), even if you pay for the professional version.
Get the free printable
Get my free quick guide printable on how to optimize images to make your site faster by clicking on the image below: